- All
- Product Name
- Product Keyword
- Product Model
- Product Summary
- Product Description
- Multi Field Search
Views: 201 Author: XianDa Publish Time: 2024-12-25 Origin: Site

Content Menu
● How to Make a Simple Window Flower Box
● Why Choose a Window Flower Box?
>> Benefits of Window Flower Boxes
>> Step 1: Measure Your Window
>> Step 4: Add Trim (Optional)
>> Step 6: Drill Drainage Holes
>> Step 7: Attach Weed Barrier
>> Step 9: Hang Your Flower Box
>> Step 10: Planting Your Flowers
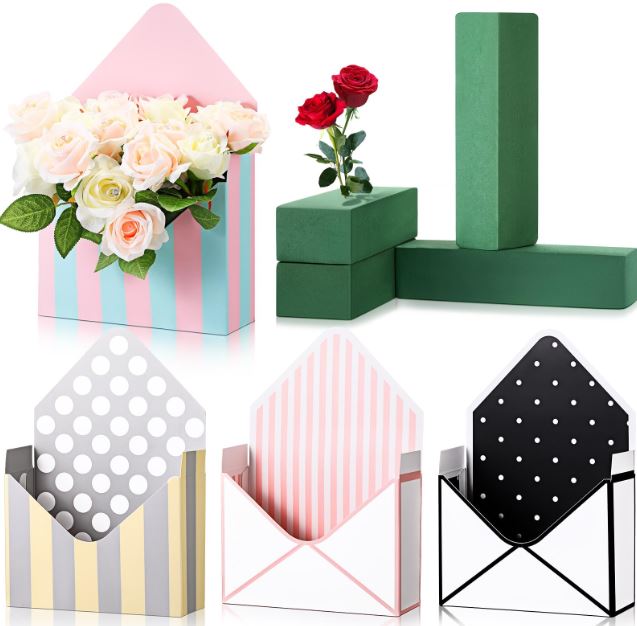
● Sourcing from Flower Paper Box Suppliers
>> Benefits of Using Flower Paper Boxes
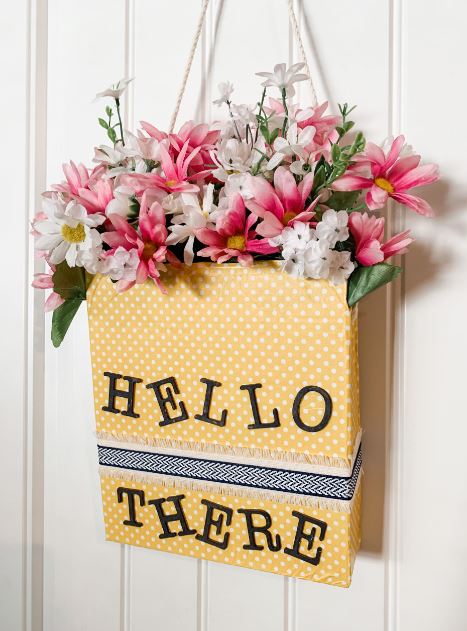
● Creative Ideas for Your Window Flower Box
Creating a window flower box is a delightful DIY project that enhances the beauty of your home while providing a perfect space for blooming flowers. In this guide, we will walk you through the process of making a simple window flower box, including materials needed, step-by-step instructions, and tips for planting. Additionally, we will explore the benefits of sourcing from a flower paper box supplier for your floral packaging needs.
Window flower boxes not only add aesthetic appeal to your home but also allow you to grow flowers and plants in limited space. They can be customized to fit any window size and can be filled with various plants, from colorful annuals to fragrant herbs.

- Enhances Curb Appeal: A well-maintained flower box can significantly improve the appearance of your home.
- Space Efficiency: Ideal for apartments or homes with limited garden space.
- Personalization: You can choose the colors and types of flowers that best suit your style.
- Improves Air Quality: Plants naturally filter air pollutants, contributing to a healthier living environment.
- Encourages Biodiversity: Attracts pollinators like bees and butterflies, promoting local ecosystems.
Before you start building your window flower box, gather the following materials:
- Wood: Cedar is recommended for its durability against weather elements. Other options include treated pine or composite materials.
- Nail/Staple Gun
- Clamps
- Exterior Wood Screws
- Trim (optional)
- Waterproof Wood Glue
- Sandpaper
- Primer and Paint
- Drill
- Weed Barrier Fabric
- L-brackets for additional support.
- Outdoor stain if you wish to enhance the wood's appearance.
- Plastic liners to protect the wood from moisture.
Determine the length and height of your window to decide how large your flower box should be. A common size is about 6 inches deep and the same length as the window or slightly longer.
Using a miter saw, cut the wood into pieces according to your measurements. You will need:
- Two long pieces for the front and back.
- Two shorter pieces for the sides.
- One or two pieces for the bottom.
1. Lay out the pieces on a flat surface.
2. Use a nail/staple gun to attach the sides to the front and back pieces. Ensure that everything is square by checking with a carpenter's square.
3. Secure the bottom piece with screws or nails, ensuring it is flush with the edges.
If desired, attach decorative trim around the top edge of the box using wood glue and nails for added style. This can give your flower box a more finished look and can be painted or stained to match your home.
Sand down any rough edges for a smooth finish. Apply primer to prevent rot and prepare for painting. Choose an exterior-grade primer that will withstand moisture.
Drill several small holes in the bottom of your flower box to allow excess water to drain out. This is crucial as standing water can lead to root rot in plants.
Staple weed barrier fabric over the drainage holes to prevent soil from escaping while allowing water to flow through. This barrier helps maintain soil integrity while also allowing excess moisture to escape.
Once everything is assembled and primed, paint or stain your flower box as desired. Consider using weather-resistant paint or stain that can withstand outdoor conditions. Allow it to dry completely before moving on.
Using brackets or screws, securely attach your flower box beneath your window. Ensure it is level so that water drains properly and does not pool on one side.
Fill your flower box with potting soil, leaving enough space at the top for planting. Choose flowers that thrive in your climate and enjoy arranging them! Consider using a mix of annuals for vibrant color throughout the season and perennials for long-lasting beauty year after year.
When selecting plants for your window flower box, consider:
- Sunlight Requirements: Ensure that chosen plants match the sunlight exposure of your window (full sun, partial shade, etc.).
- Height Variations: Mix tall plants with shorter ones for visual interest; consider using trailing plants like ivy at the edges.
- Seasonal Blooms: Consider planting perennials for year-round blooms or annuals for seasonal color changes.
- Color Palette: Choose colors that complement each other as well as your home's exterior; think about contrasting colors or sticking with a monochromatic scheme.
Maintaining your window flower box is essential for keeping it looking its best:
1. Watering: Check soil moisture regularly; most flowering plants prefer moist but not soggy soil.
2. Fertilizing: Use a balanced fertilizer every few weeks during the growing season to promote healthy growth.
3. Deadheading: Remove spent flowers regularly to encourage new blooms and keep plants looking tidy.
4. Pest Control: Keep an eye out for pests like aphids or spider mites; use organic pest control methods when necessary.
5. Seasonal Changes: In late fall, remove dead plants and clean out debris; consider adding mulch before winter.
When it comes to presenting your floral arrangements, sourcing from a reputable flower paper box supplier can elevate your floral gifts. These suppliers offer various styles and sizes of boxes designed specifically for flowers, ensuring they arrive at their destination in perfect condition.


1. Durability: High-quality materials protect flowers during transport; these boxes are often designed with ventilation holes that help maintain freshness.
2. Aesthetics: Attractive designs enhance presentation; many suppliers offer customizable options so you can match them with specific occasions like weddings or birthdays.
3. Customization: Many suppliers offer personalized options tailored to specific events or themes; this could include printed logos or special messages on boxes.
4. Eco-Friendliness: Many suppliers now offer eco-friendly options made from recycled materials, appealing to environmentally conscious consumers.
To make your window flower box stand out even more, consider these creative ideas:
1. Herb Garden: Plant culinary herbs such as basil, parsley, and thyme; this not only looks great but also provides fresh ingredients for cooking.
2. Succulent Display: Create an arrangement of various succulents; these low-maintenance plants thrive in sunny spots and require minimal watering.
3. Seasonal Themes: Change out plants seasonally; use spring flowers like pansies, summer blooms like petunias, fall decorations like ornamental kale, and winter evergreens.
4. Mixed Arrangements: Combine flowers with trailing vines like sweet potato vine or creeping jenny for added texture and movement.
Building a simple window flower box is an enjoyable project that adds charm to any home while allowing you to showcase beautiful plants. By following these steps and sourcing quality materials from a trusted flower paper box supplier, you can create stunning floral displays that brighten up your living space.
---
1. What type of wood is best for outdoor flower boxes?
Cedar is ideal due to its natural resistance to rot; however, treated pine can also be used if properly sealed.
2. How do I maintain my window flower box?
Regularly check for drainage issues, deadhead spent flowers, and replenish soil nutrients as needed.
3. Can I use plastic instead of wood?
Yes, PVC or composite materials are great alternatives as they are rot-resistant and require less maintenance.
4. What flowers are best for full sun?
Consider petunias, geraniums, or marigolds as they thrive in sunny conditions.
5. How do I winterize my flower box?
Remove dead plants, clean out debris, and consider adding mulch or protective coverings if you live in an area with harsh winters.
---


