- All
- Product Name
- Product Keyword
- Product Model
- Product Summary
- Product Description
- Multi Field Search
Views: 203 Author: XianDa Publish Time: 2024-12-27 Origin: Site

Content Menu
● How to Build a Flower Box Out of Landscape Timbers
● Maintaining Your Landscape Timber Flower Box
● Alternative: DIY Wood Planter Box
>> Steps:
Building a flower box using landscape timbers is an excellent way to add charm and functionality to your garden or outdoor space. This DIY project is not only cost-effective but also allows you to customize the size and design to fit your specific needs. In this comprehensive guide, we'll walk you through the process of creating a beautiful and durable flower box using landscape timbers, while also touching on related topics such as flower paper box suppliers.
Before we begin, let's gather the necessary materials and tools:
- Landscape timbers (quantity depends on the size of your box)
- 4-inch wood screws
- 3/8-inch rebar
- Drill and drill bits
- Circular saw or handsaw
- Measuring tape
- Level
- Hammer
- Safety glasses and work gloves
- Landscaping fabric
- Soil and plants
First, decide on the size and location of your flower box. A typical size for a landscape timber flower box is 8 feet long by 3 feet wide, but you can adjust this to fit your space. Measure and mark the area where you'll place the box.
Clear the area of grass and debris. Use a level to ensure the ground is as even as possible. If necessary, add or remove soil to create a level surface.
Using a circular saw or handsaw, cut your landscape timbers to the desired length. For an 8x3 foot box, you'll need:
- 4 full-length timbers (8 feet each) for the long sides
- 6 shorter timbers (3 feet each) for the short sides
Place the first layer of timbers in a rectangle shape, with the shorter pieces inside the longer ones at the corners. Use a level to ensure they're even[1].


Pre-drill holes at each corner and secure the timbers together using 4-inch wood screws. This will create a stable base for your flower box[2].
Continue adding layers of timbers, alternating the corner overlaps with each new layer. Secure each layer to the one below it using wood screws[2].
For added stability, drill holes through the timbers at each corner and in the middle of the long sides. Insert 3/8-inch rebar through these holes and hammer them into the ground[2].
Drill several drainage holes in the bottom layer of timbers to prevent water from pooling in your flower box[3].
Cut landscaping fabric to fit the inside of your box, allowing it to come up the sides slightly. This will help with drainage and prevent soil from escaping between the timbers[4].
Fill your flower box with a mixture of good-quality potting soil and compost. Now you're ready to plant your favorite flowers or vegetables!
- Choose pressure-treated landscape timbers for better durability against moisture and insects.
- Consider adding a layer of gravel at the bottom of the box for improved drainage.
- Apply a wood sealer to the exterior of your flower box to protect it from the elements.
- If you're planting edibles, use a food-safe wood sealer or line the interior with plastic sheeting.
Once you've mastered the basic construction, you can get creative with your flower box design. Here are some ideas:
1. Multi-tiered design: Create a stepped effect by making each layer slightly smaller than the one below it.
2. Built-in seating: Extend one side of the box to create a bench seat.
3. Trellis addition: Attach a trellis to one side for climbing plants.
4. Decorative touches: Add decorative caps to the top layer or paint the timbers for a pop of color.
To ensure your flower box lasts for years to come, follow these maintenance tips:
1. Regularly check for loose screws or rebar and tighten as needed.
2. Reapply wood sealer every 1-2 years to protect against weathering.
3. Monitor the soil level and top up as needed.
4. Clean out dead plants and debris at the end of each growing season[6].
If you're looking for a simpler project or have limited space, consider building a DIY wood planter box. This project can be completed in about 30 minutes and requires fewer materials[10].
- 1x6 boards
- 2x3 boards
- Nails
- Wood stain and sealant
1. Assemble one side of the box using three 1x6 boards and two 2x3 boards.
2. Attach the second side in the same manner.
3. Repeat the process for all sides of the planter.
4. Apply wood stain and seal with a Spar Varnish for weather resistance.
5. Add plants and display on your porch or in your garden[10].
This simple wood planter box is versatile and can be used for various plants, including hydrangeas, mums, or even herbs.
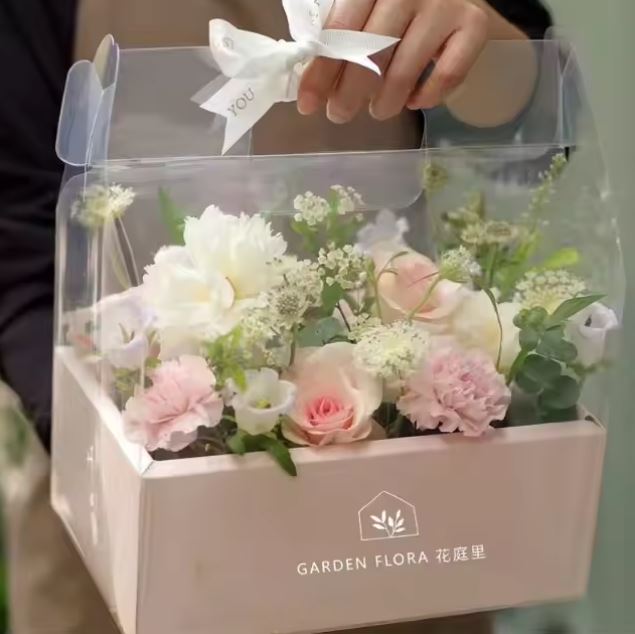
While we've focused on building sturdy landscape timber and wood planter boxes, it's worth mentioning that there are alternatives for those looking for more temporary or portable options. Flower paper box suppliers offer a range of products that can be useful for florists, event planners, or those who want a quick and easy solution for flower displays.
Flower paper boxes come in various sizes, shapes, and designs, making them versatile for different occasions. They're often used for:
- Floral arrangements for events
- Gift packaging for bouquets
- Temporary displays in retail settings
- DIY craft projects

When choosing a flower paper box supplier, consider factors such as:
1. Quality: Look for boxes made from sturdy materials that can support the weight of flowers and water.
2. Design options: Choose a supplier that offers a variety of styles to suit different needs.
3. Customization: Some suppliers offer custom printing or branding options.
4. Eco-friendliness: Many flower paper box suppliers now offer biodegradable or recyclable options.
Building a flower box out of landscape timbers or creating a simple wood planter box is a rewarding DIY project that can enhance your outdoor space and provide a perfect home for your plants. With some basic tools and materials, you can create a durable and attractive planter that will last for years. Whether you're growing flowers, herbs, or vegetables, these projects offer flexibility and functionality.
Remember, while we've focused on permanent landscape timber and wood solutions, flower paper box suppliers offer alternatives for those needing temporary or portable options. Both have their place in the world of gardening and floral design.
By following the steps outlined in this guide, you can create beautiful and functional planters that will add charm to your garden, porch, or patio. Don't be afraid to get creative and customize your flower boxes to suit your style and needs. Happy gardening!
1. Q: How long will a landscape timber flower box last?
A: With proper maintenance and regular sealing, a landscape timber flower box can last 10-15 years or more.
2. Q: Can I use landscape timbers for raised vegetable beds?
A: Yes, but ensure you use food-safe sealers or liners if you're growing edibles.
3. Q: How deep should a flower box be?
A: A depth of 12-18 inches is suitable for most plants. Adjust based on the specific needs of your chosen plants.
4. Q: Do I need to line the inside of the flower box?
A: While not strictly necessary, lining with landscape fabric can improve drainage and prevent soil loss.
5. Q: Where can I find reliable flower paper box suppliers?
A: Look for reputable floral supply companies or packaging specialists online or in your local area. Check reviews and ask for samples before making large orders.
Citations:
[1] https://www.youtube.com/watch?v=AiNVRfdMTGg
[2] https://frostygarden.com/topics/building-diy-raised-beds-from-landscape-timbers/
[3] https://blog.minwax.com/05/11/how-to-build-durable-outdoor-planter-box/
[4] https://www.thisoldhouse.com/gardening/21016533/how-to-build-a-raised-planting-bed
[5] https://www.youtube.com/watch?v=DvAjIlzPZPk
[6] https://mournewood.com/proper-maintenance-care-wooden-planters/
[7] https://www.youtube.com/watch?v=TAeg6d-s-7U
[8] https://southernyankeediy.com/projects/diy-decor/easy-wooden-flower-box-with-handle/
[9] https://gardensavvy.com/gardening-blog/garden-guides/window-boxes-101-choosing-plants-installation-care-and-maintenance-and-more/
[10] https://jennakateathome.com/diy-wood-planter-box/